

Old Airport Lounge
Magic Window Air v1 Support
Thank you for flying with Magic Window Air. This is the support page for the original versions of MWA (v1.) If you are using the latest version (v3) please visit the new Airport Lounge.
We are sorry if you have had an issue with the app - we are happy to help you solve it. The Airport Lounge is where we provide support for Magic Window Air on Mac. Here you will find answers to all common questions and issues that we are aware of. The lounge is divided into five terminals - you can jump directly to them from the links below:
Terminal B: Troubleshooting - General problems and troubleshooting (downloads, performance.)
Terminal C: Frequently Asked Questions - Common questions about how to use the app.
Terminal D: Contact Us - Help! None of this is working for me.
Terminal E: Uninstall - How to uninstall the app and remove all downloads.
Magic Window Air is fully compatible with macOS Ventura and Apple Silicon.
If what you are looking for isn’t here, please fill out the MWA Support Request Form and we will get back to you within 24 hours. Thank you for your patience and have a good day!
This section is focused on getting the app installed and setup including changing various macOS settings that may be necessary to make it work correctly.
A1 - Installing the Screen Saver
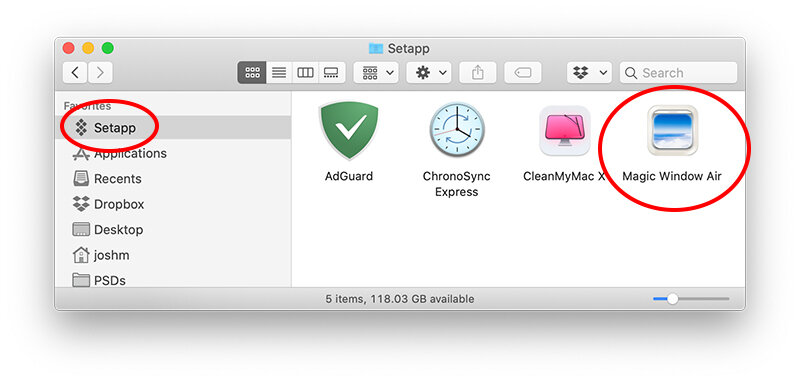
The first step to using Magic Window Air is running the app to install the Screen Saver. To install simply run the “Magic Window Air” app in your Applications/Setapp folder. Any time you run the app, if the Screen Saver is not installed, it will prompt you to install it. You must complete installation for the screen saver to work. If the pre-flight check indicates the “Screen Saver is not installed” this can be resolved by quitting and running the app again:

A2 - Pre-flight Issues

Once you have the app installed and running you can access the the pre-flight check by clicking the airplane icon on your menu bar. The check will indicate if any settings may need to be changed on your system in order for the Screen Saver to work.
If you see yellow or red dots there may be an issue you need to investigate. This section describes how to solve these issues.
Note that for laptops the Energy Saver settings are different when power is connected, so this error may change when you change power sources.
A2a - Setting Activation Time
If pre-flight indicates the following: “Screen Saver Activation Time is set to never” it means that you do not have an activation time set for the system screen saver. If you activate the screen saver exclusively with hot corners this is not a problem. However most people will want to set an activation time. To do this, click “Open System Preferences” in the Airport pop-over, and select the Screen Saver tab. The activation time is set at the bottom of this window.

A2b - Adjusting Energy Saver Preferences
If pre-flight indicates the following: “Energy Saver settings may conflict” it means that your Mac may be set to sleep or turn off the display before the Screen Saver is activated. You can check and adjust the Energy Saver settings by opening System Preferences, selecting the Energy Saver section, and adjusting the “display off” or “sleep” time.


A2c - Setting up Hot Corners

One easy way to activate the screen saver is with Hot Corners. These are set up in the System Preference / Screen Saver panel similar to how activation time is set. Note that you can have the Screen Saver Activation time set to Never and still use the Screen Saver with Hot Corners alone.
A2d - Selecting the Screen Saver

When the Screen Saver is installed it is automatically selected. However if you select another Screen Saver, or install another Screen Saver that selects itself, you may see the error “Screen Saver is installed but not selected.” This error may also show if your system is managed by an administrator in a way that prevents choice of Screen Saver. You can try manually selecting the Screen Saver by opening System Preferences -> Desktop & Screen Saver panel. This is most easily accessed by clicking “Open System Preferences” in the Airport popover.

Common Fix: If you are experiencing issues with the System Preferences panel, closing and re-opening System Preferences will usually resolve the issue. This re-loads the plug-in.
Note that many of the answers in this section involve accessing Screen Saver Options which can be found on the System Preferences/Screen Saver panel. The easiest way to get here is by pressing “Open System Preferences” in the Airport popover.
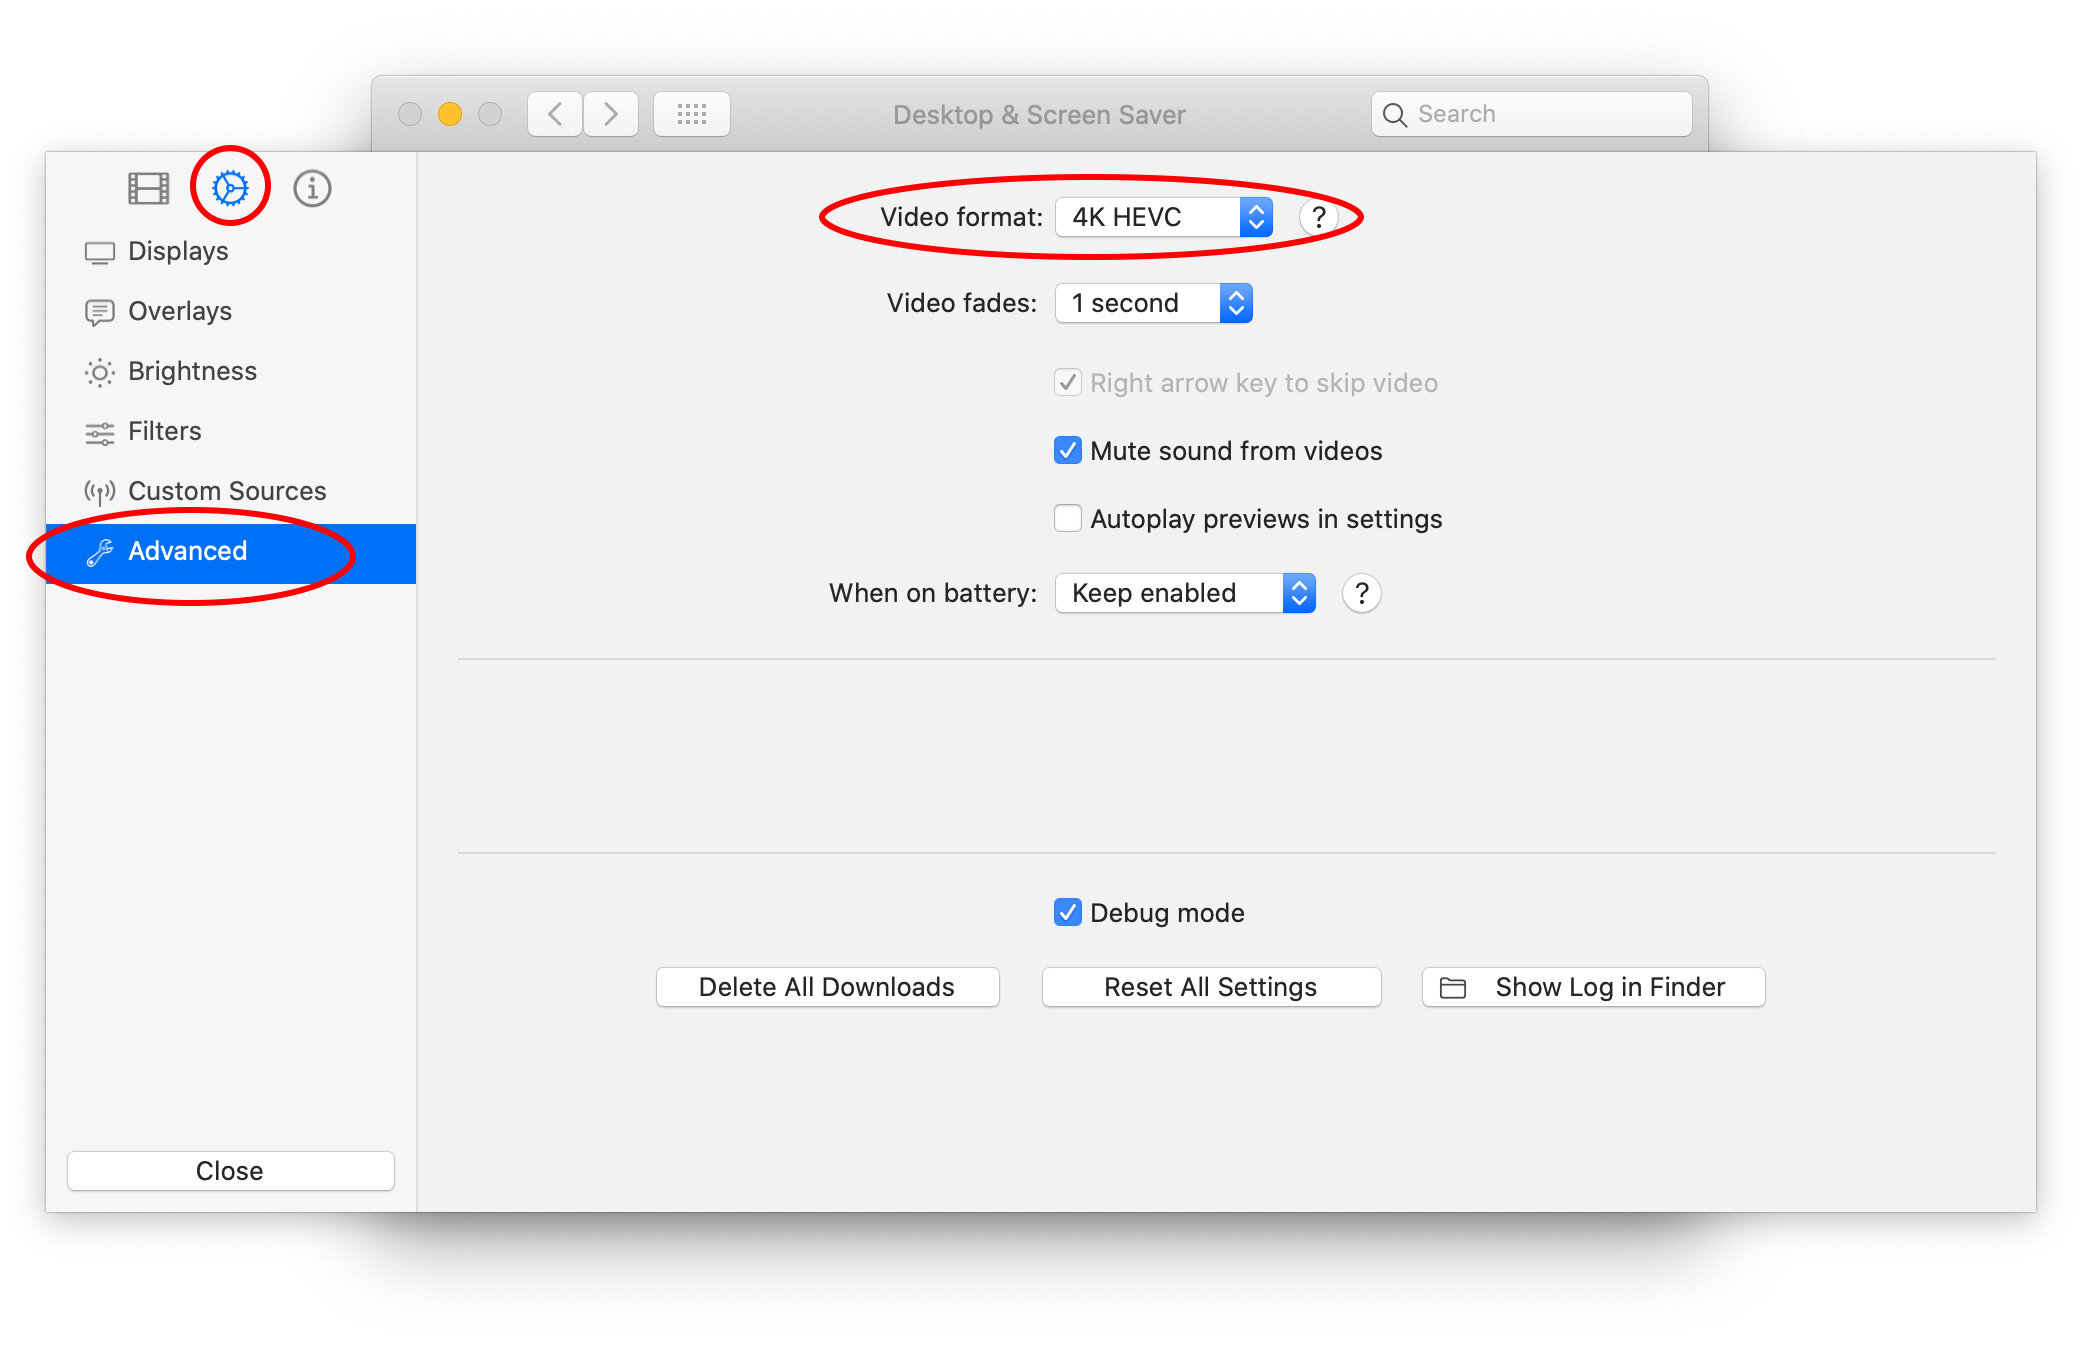
Magic Window Air offers three different formats of video and automatically selects which format is best for your Mac based on a complicated algorithm. Depending on your Mac model, the app may select HD because it does not believe the machine has the hardware necessary to run 4K. To override this setting…
Open System Preferences/Screen Saver…
Press Screen Saver Options…
Press the gear (Settings) in the upper left…
Select Advanced on the left…
Choose video format from the drop-down.
About HEVC and hardware decoding
MWA uses Apple's AVFoundation framework to play the videos as your screen saver. When available, AVFoundation will use hardware decoding (from your CPU or your graphics card) to minimize the resources needed for video playback. You can find guidelines in the help button next to the Video Format setting. By default, MWA automatically selects the most appropriate format for your Mac. Please note that all 4K HEVC videos are encoded with the Main10 profile, which may not be hardware accelerated by your machine, while some other HEVC videos (encoded in Main profile) will be.
While we wish to provide everyone with the best setting for their machine, the GVA framework from Apple doesn't let us distinguish HEVC Main10 profile acceleration from general HEVC acceleration. Early feedback we gathered also seems to point that on machines with multiple decoding options (Intel QuickSync and AMD UVD), QuickSync will always be preferred (even if you "force" the discrete GPU use with an external monitor or via code, as of macOS Mojave).
These are our recommendations so far:
Macs older than 2011 may lack H.264 acceleration.
Macs with an Intel CPU (With iGPU) from the Sandy Bridge (2011) generation to Broadwell (Early 2015) should have H.264 hardware acceleration available.
Late 2015 and 2016 Macs (Skylake and Kaby Lake) may only have partially accelerated HEVC decoding. We recommended you stick to 1080p H.264 on laptops. You may consider the HEVC format on desktops but understand that decoding may be CPU intensive and spin up your fans.
Macs 2017 and up should have full HEVC acceleration (the 2017 12 inch Macbook being a notable exception, only having partially accelerated HEVC decoding).
B2 - The videos are skipping or choppy when played back.
Depending on your Mac model, the number of displays connected, the resolution of those displays, and your multi-monitor settings, your Mac may not have enough power to play the videos smoothly. If video playback is not smooth the best thing to try is changing the resolution setting as described above in B1. Realistically you need a pretty powerful Mac to run more than 2 4K streams at a time.
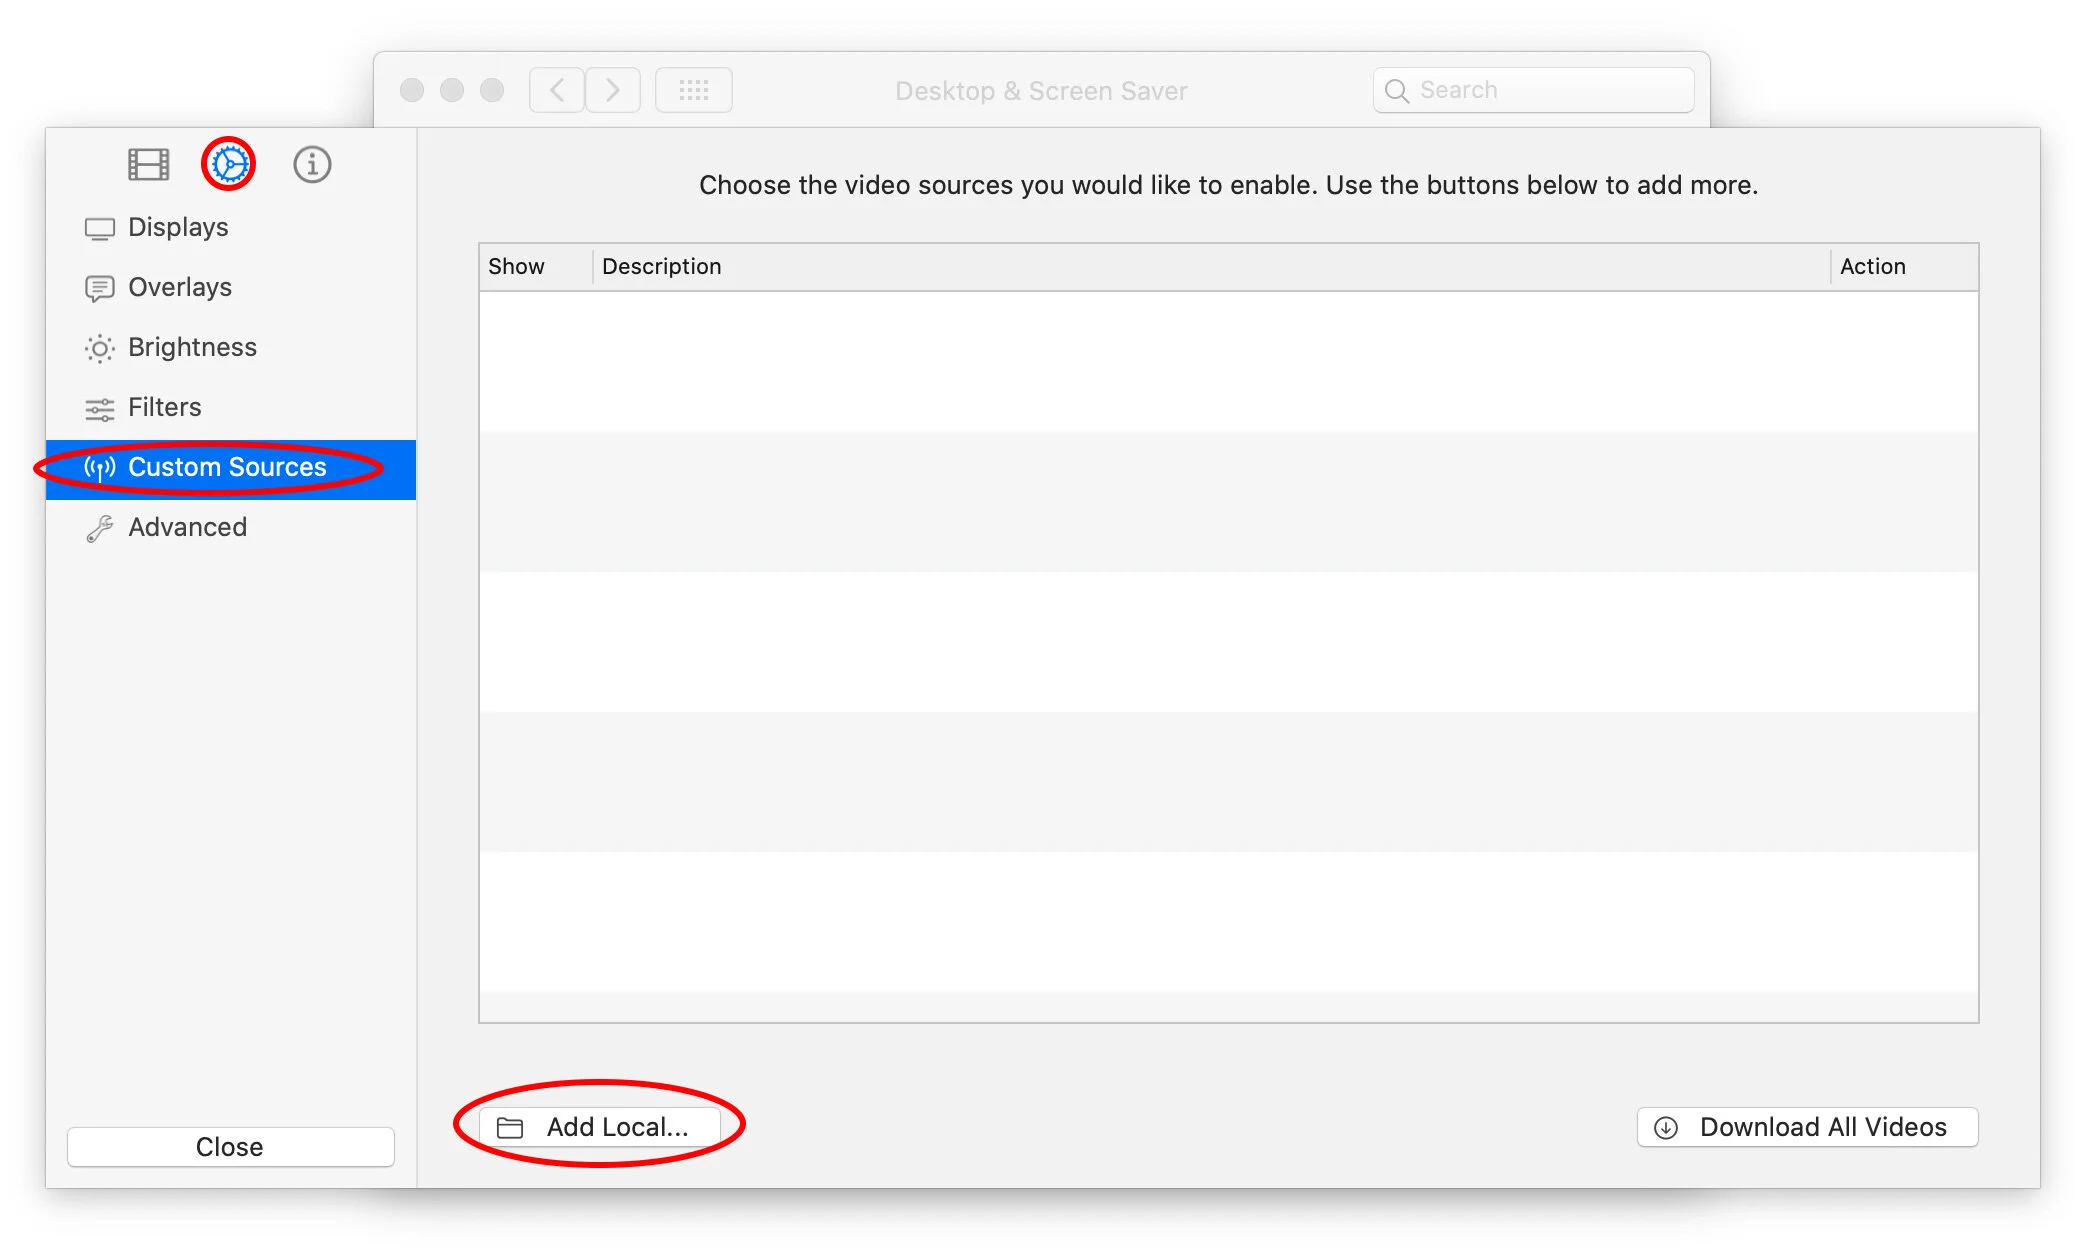
B3 - There are a few videos playing over and over - how do I get all the videos?

Magic Window Air progressively downloads more videos each time it is activated. In your first hours using the app, you may see videos repeat more often, as the total number of videos downloaded is slowly growing. If you are seeing the same few videos cycle, you can just wait for more to download, or force them to download through the Screen Saver Options panel.
Open System Preferences/Screen Saver…
Press Screen Saver Options…
Select the gear (Settings) in the upper left…
Select Custom Sources on the left…
Press Download All Videos.
B4 - The exact same video plays over and over (Oregon) - more videos never download!
Magic Window Air downloads the videos it plays from our magical cloud. In order to download these videos your system must not have apps blocking network access. The most common reason why downloads do not work is the network filter Little Snitch. If you use Little Snitch you must follow the directions below for downloads to work.
1. Have you confirmed you have free disk space?
For videos to download there must be free space available on your main disk. Depending on the format you have selected, up to 10GB of storage space is required to download all videos.
2. Have you checked your network connection?
To confirm you can access our server open http://air.magicwindow.tv/ in your browser. If you see the text “Welcome to Jetson Creative Media Server” that indicates your network is at least allowing access to the manifests. If you are unable to access this please check your network or filters (steps below.)

3. Are you using any network filters or blockers like Little Snitch?
The most common source of problems with downloading in Aerial is applications that block network access like Little Snitch. If you use Little Snitch or a similar app to monitor or block your network access you may need to manually add access to the following hosts:
air.magicwindow.tv
public.24hourwallpaper.com
Prior to Catalina access is granted to ScreenSaverEngine. On Catalina access needs to be granted for legacyScreenSaver which can be found here:
/System/Library/Frameworks/ScreenSaver.framework/PlugIns/legacyScreenSaver.appex
4. Is it possible your network source is being filtered or blocked
In some countries and locations network filters are in place limiting access to certain sites. If you have already done the above steps and tried accessing our server in your browser, try using the alternate links provided in the install instructions. We offer two different download hosts and it could be one is blocked for you but the other is not.
B5 - The text label and clock don’t appear to be Retina resolution.

Due to performance issues on certain Mac models, the title and other text you see overlaid on the Screen Saver is 1x resolution by default. If you have a Mac with a discrete GPU you can change this option and will likely not encounter problems. To enable 2X text:
Open System Preferences/Screen Savers and press Screen Saver Options.
Press the Settings gear on the upper left.
Select the Overlays tab.
Press Text Settings at the bottom.
Check “High quality text”
B6 - When I switch between MWA and other Screen Savers in System Preferences, it sometimes shows the wrong Screen Saver and options panel.
This is an unfortunate macOS bug that results from the Screen Saver panel only being able to load one Swift Screen Saver at a time. If you switch between Swift-based Screen Savers like MWA and Aerial, you need to close and reopen System Preferences to apply the change and access the other Screen Saver.
Magic Window Air is highly customizable and full of features that let you tune and enhance it. In this section we address the most commonly requested options and how to use them.
Note that many of the answers in this section involve accessing “Screen Saver Options” which can be found on the System Preferences/Screen Saver panel. The easiest way to get here is by pressing “Open System Preferences” in the Airport popover.
C1 - Can I add a clock or countdown to the Screen Saver?
There are two different ways to add a clock. The first is with the built-in macOS Screen Saver clock, which moves in a circle around the screen. This can be enabled by checking the “Show with Clock” checkbox in System Preferences/Screen Saver. The app also has a built-in, highly configurable clock that can be enabled and configured from the “Overlays” panel in Screen Saver Options.

C2 - Can I turn off the title? Or make it hide after 10 seconds?
Yes, you can hide or customize the title (“Location”) - it can also be set to hide after 10 seconds. These options are also in the “overlays” panel under Screen Saver Options/Settings similar to the Clock option above.

C3 - Can I add my own videos to the Screen Saver?
Yes! You can add your own videos to the collection by following these steps:
Open System Preferences / Screen Savers…
Press Screen Saver Options…
Press the Settings gear in the upper left…
Select the Custom Sources tab…
Click Add Local.
C4 - Can I show only certain videos, or hide videos I don’t like?
The app offers several ways to both hide videos and select subsets of videos. If you’re interested in seeing only certain types of videos, you can select different categories under “Currently Plays” at the top of the video browser (in System Preferences under Screen Saver Options.) If you want to hide a specific video, you can select the video and press the “Hide” button.
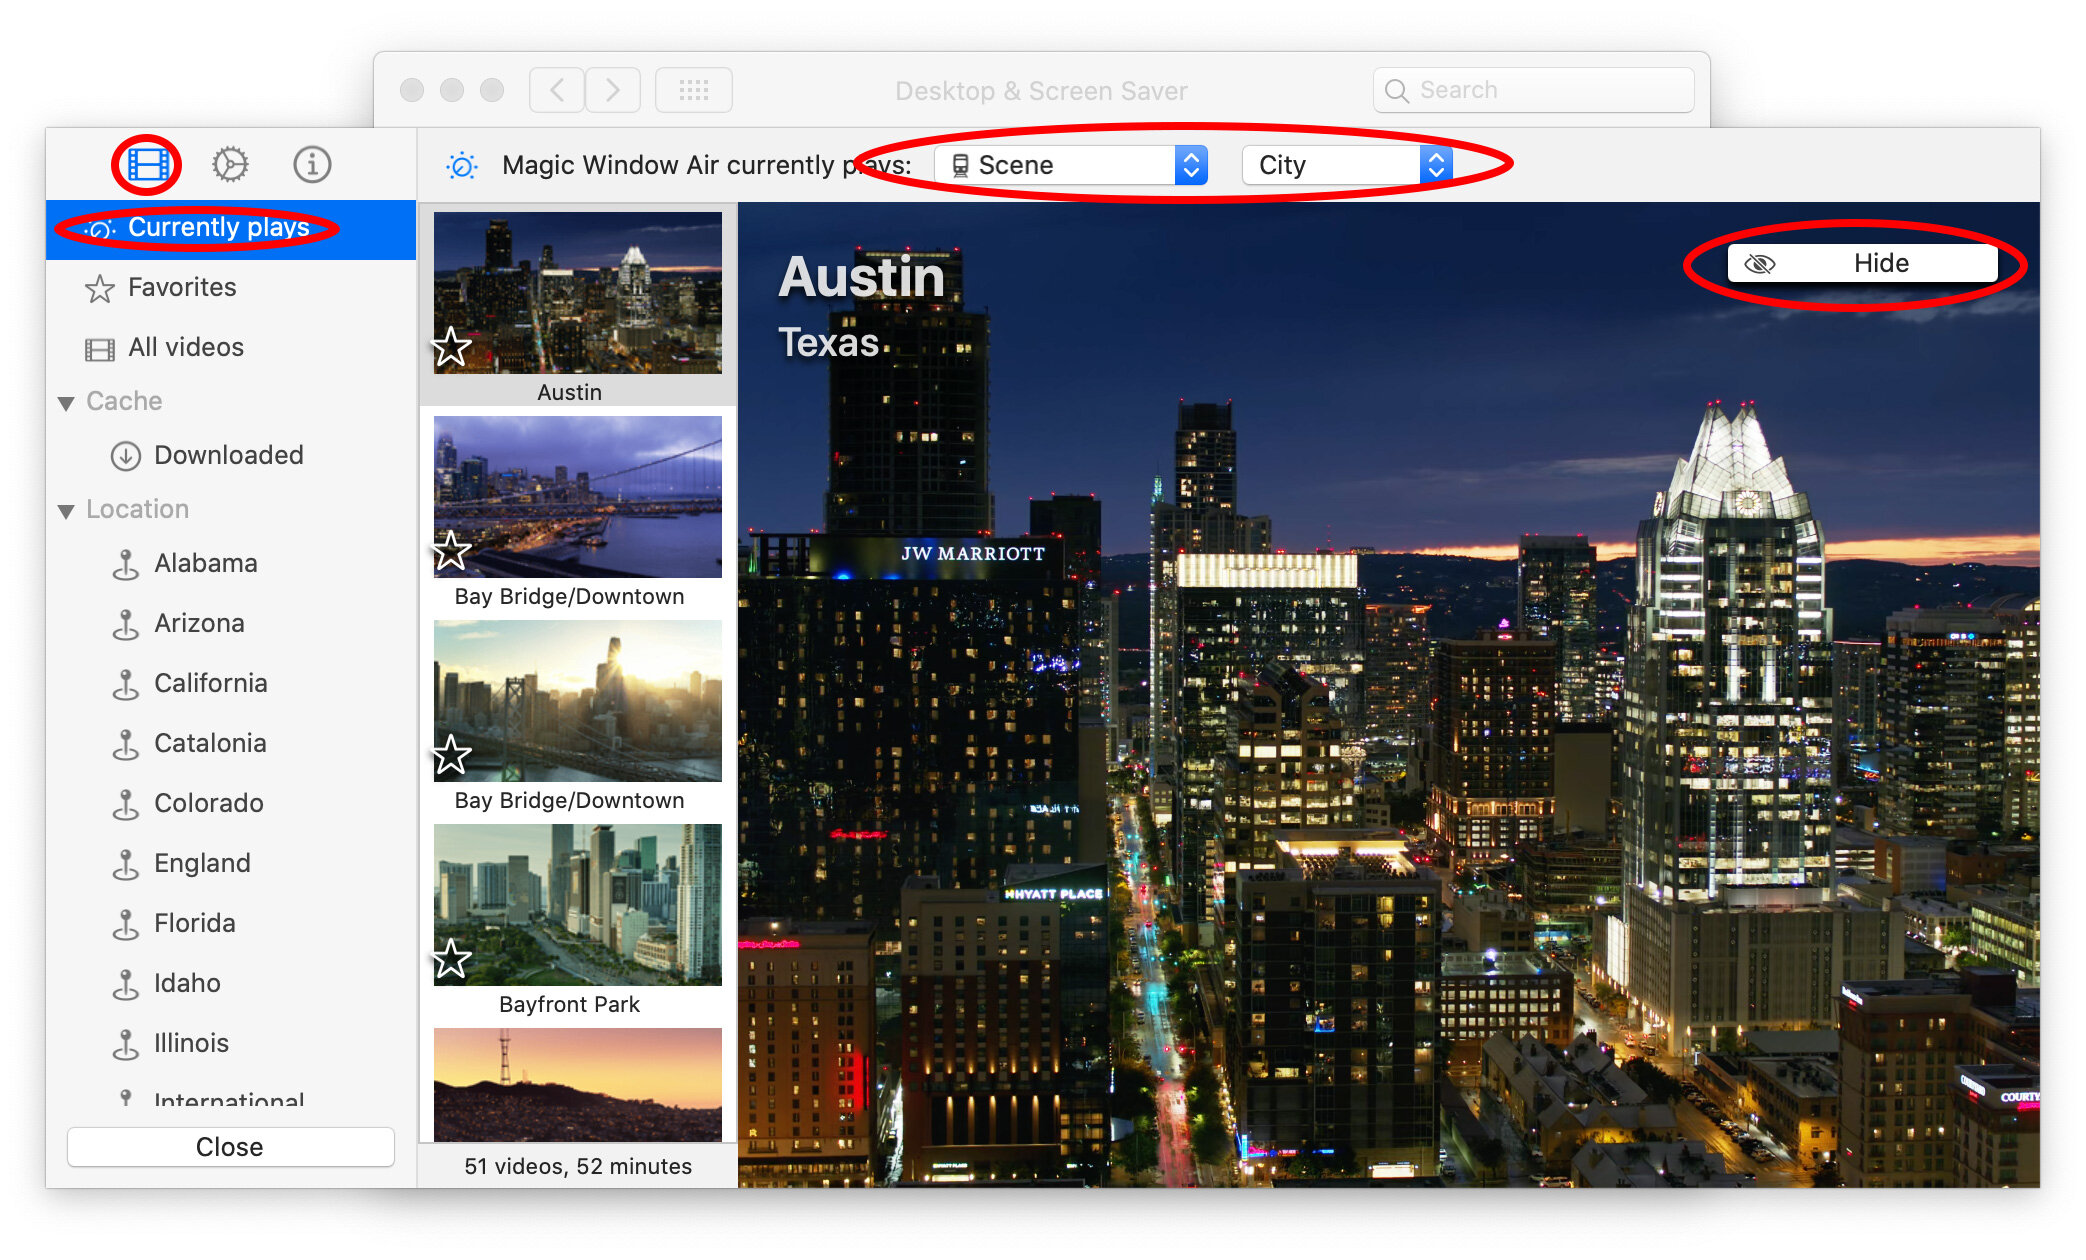
C5 - How do I unhide a video?
You can find all hidden videos in the “Hidden” section at the bottom of the sources list on the left (in System Preferences -> Screen Saver Options.) Once you have found the “Hidden” section, you can select any video and press the “Show” button to unhide it.

C6 - Can I disable specific monitors?
Yes, you can enable or disable specific monitors through the “Displays” section of the Screen Saver Options panel. Set “Play videos on:” to “Selected Displays” and then click the displays you want to enable or disable.

C7 - Can I have one video span across multiple monitors?
Yes, you can choose to span one video across several displays through the “Displays” section of the Screen Saver Options panel. Select “Spanned” as the option under “Viewing mode:”

C8 - Is there a quick way to download all of the videos at once?
Yes, please see B3 above for instructions.
C9 - How much storage space do the videos consume?
The videos downloaded by the Screen Saver will vary in size depending on what format you have selected. Here are the total sizes for each format option: 4K - 10.0GB, HD HEVC (SDR) - 5.8GB, HD H264 - 7.5GB
C10 - Can the videos be moved to another drive?
Sorry, no. Due to macOS limitations the videos must be in the legacyScreenSaver container.
C11 - Can a limit be set on how many videos to download?
You can set a limit on the maximum amount of disk space for downloads to use on the Cache panel. You can also disable automatic downloads to prevent the app from consuming more space. To get to the Cache panel, open System Preferences/Screen Saver, press Screen Saver Options, press the Gear button in the upper left, and then select the Cache panel on the left.

C12 - Can I include videos from the Aerial screen saver? Can Aerial include MWA videos?
Sorry, no. At this time we have not found a way to allow Aerial and MWA to access each others videos. This is something we are investigating for the future.
C13 - Can I include videos from standard Magic Window and Magic Window 4K?
Sorry, no. At this time the Screen Saver does not support including videos from Magic Window and Magic Window 4K. This is something we are investigating for the future.
We are happy to help with any issues you have or answer any questions not covered in the Lounge. We are a tiny airline so it may take us up to 24 hours to respond to your request. The best way to reach us is through the Magic Window Air Support & Feedback Form. This form allows you to attach photos, videos, and logs, which can be very helpful in resolving issues. You can also e-mail us at support@magicwindow.app.
We hope you had a good adventure! Follow the steps below to remove the downloads, plug-in, and app from your system. Note that it is easiest to remove the downloads while you still have the plug-in installed.
Part 1 - Remove Downloads
Open System Preferences/Screen Saver.
Press “Screen Saver Options.”
Press the settings gear in the upper left.
Select the “Advanced” tab on the left.
Click Delete Downloads.
Close the Magic Window Air panel.
Part 2 - Remove Plug-in and App
In the System Preferences/Screen Saver panel, right click on "Magic Window Air” and select Delete. This will remove the plug-in from your system, but the app still needs to be removed.
Open the Setapp folder and drag Magic Window Air to the trash. Empty trash.
That’s it! After those steps Magic Window Air is fully removed from your Mac.