
Creating custom
24 Hour Wallpapers
The new 24 Hour Wallpaper 2026.5 beta introduces a major new feature that allows you to create custom 24 Hour Wallpapers. This is a feature that was highly requested, but repeatedly delayed, largely because we thought the creation process was simply too hard. New generative tools now make the process far simpler and more accessible, reducing the time it takes to make a wallpaper from weeks to hours.
Getting Started
To get started you’ll need to get the 24 Hour Wallpaper 2026.5 beta.
Mac App Store users: Install the beta from TestFlight. If you already participated in the 2026 beta you should have already received access to the update - just install it from TestFlight.
Setapp users: Sign up for Setapp Beta. The beta will become available directly through Setapp once you sign up. For Setapp users, using the Setapp beta ensures that you retain settings and don’t duplicate downloads.
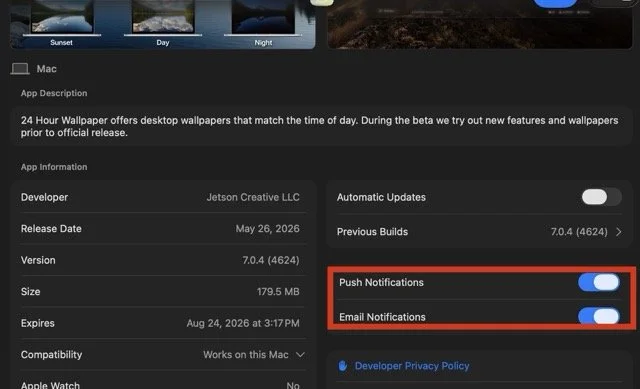
By default TestFlight will send you an email every time we update the build. To disable these emails, open TestFlight on Mac, select 24 Hour Wallpaper, and scroll to the bottom of the page where you’ll find switches to enable/disable email and push notifications. See the screenshot here on the right for guidance.
Creation Workshop - June 11th, 2026 5-7PM Pacific
For those who would prefer to learn hands-on, we will be offering a workshop on June 11th, 2026, in which we will walk through the entire creation process end-to-end. This includes both camera-based and AI-based approaches for creating wallpaper. We will post a recording of this workshop after it is completed, and that will become the new video guide.
Importing custom wallpapers
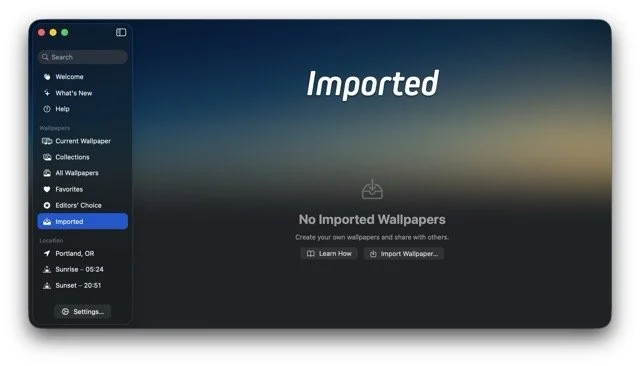
The new feature in the app that enables creation is Import. You can select the “Imported” tab from the Wallpaper Browser left-menu, and click the Import Wallpaper button to add a wallpaper. If you don’t see the “Imported” tab in your version of the app, you aren’t running the latest beta.
The easiest way to install a new wallpaper is simply to double-click the wallpaper in macOS Finder, or drag and drop the wallpaper into 24 Hour Wallpaper. Once the beta is installed, all files with a .24h extension will automatically open and import into the app. At this time the import feature is the extent of creation in the app itself - the actual creation process happens in the Create tool.
We’ve posted three sample wallpapers that you can download and import today to get started. You can get these three wallpapers from the gallery section of the Create tool.
Accessing the Create tool
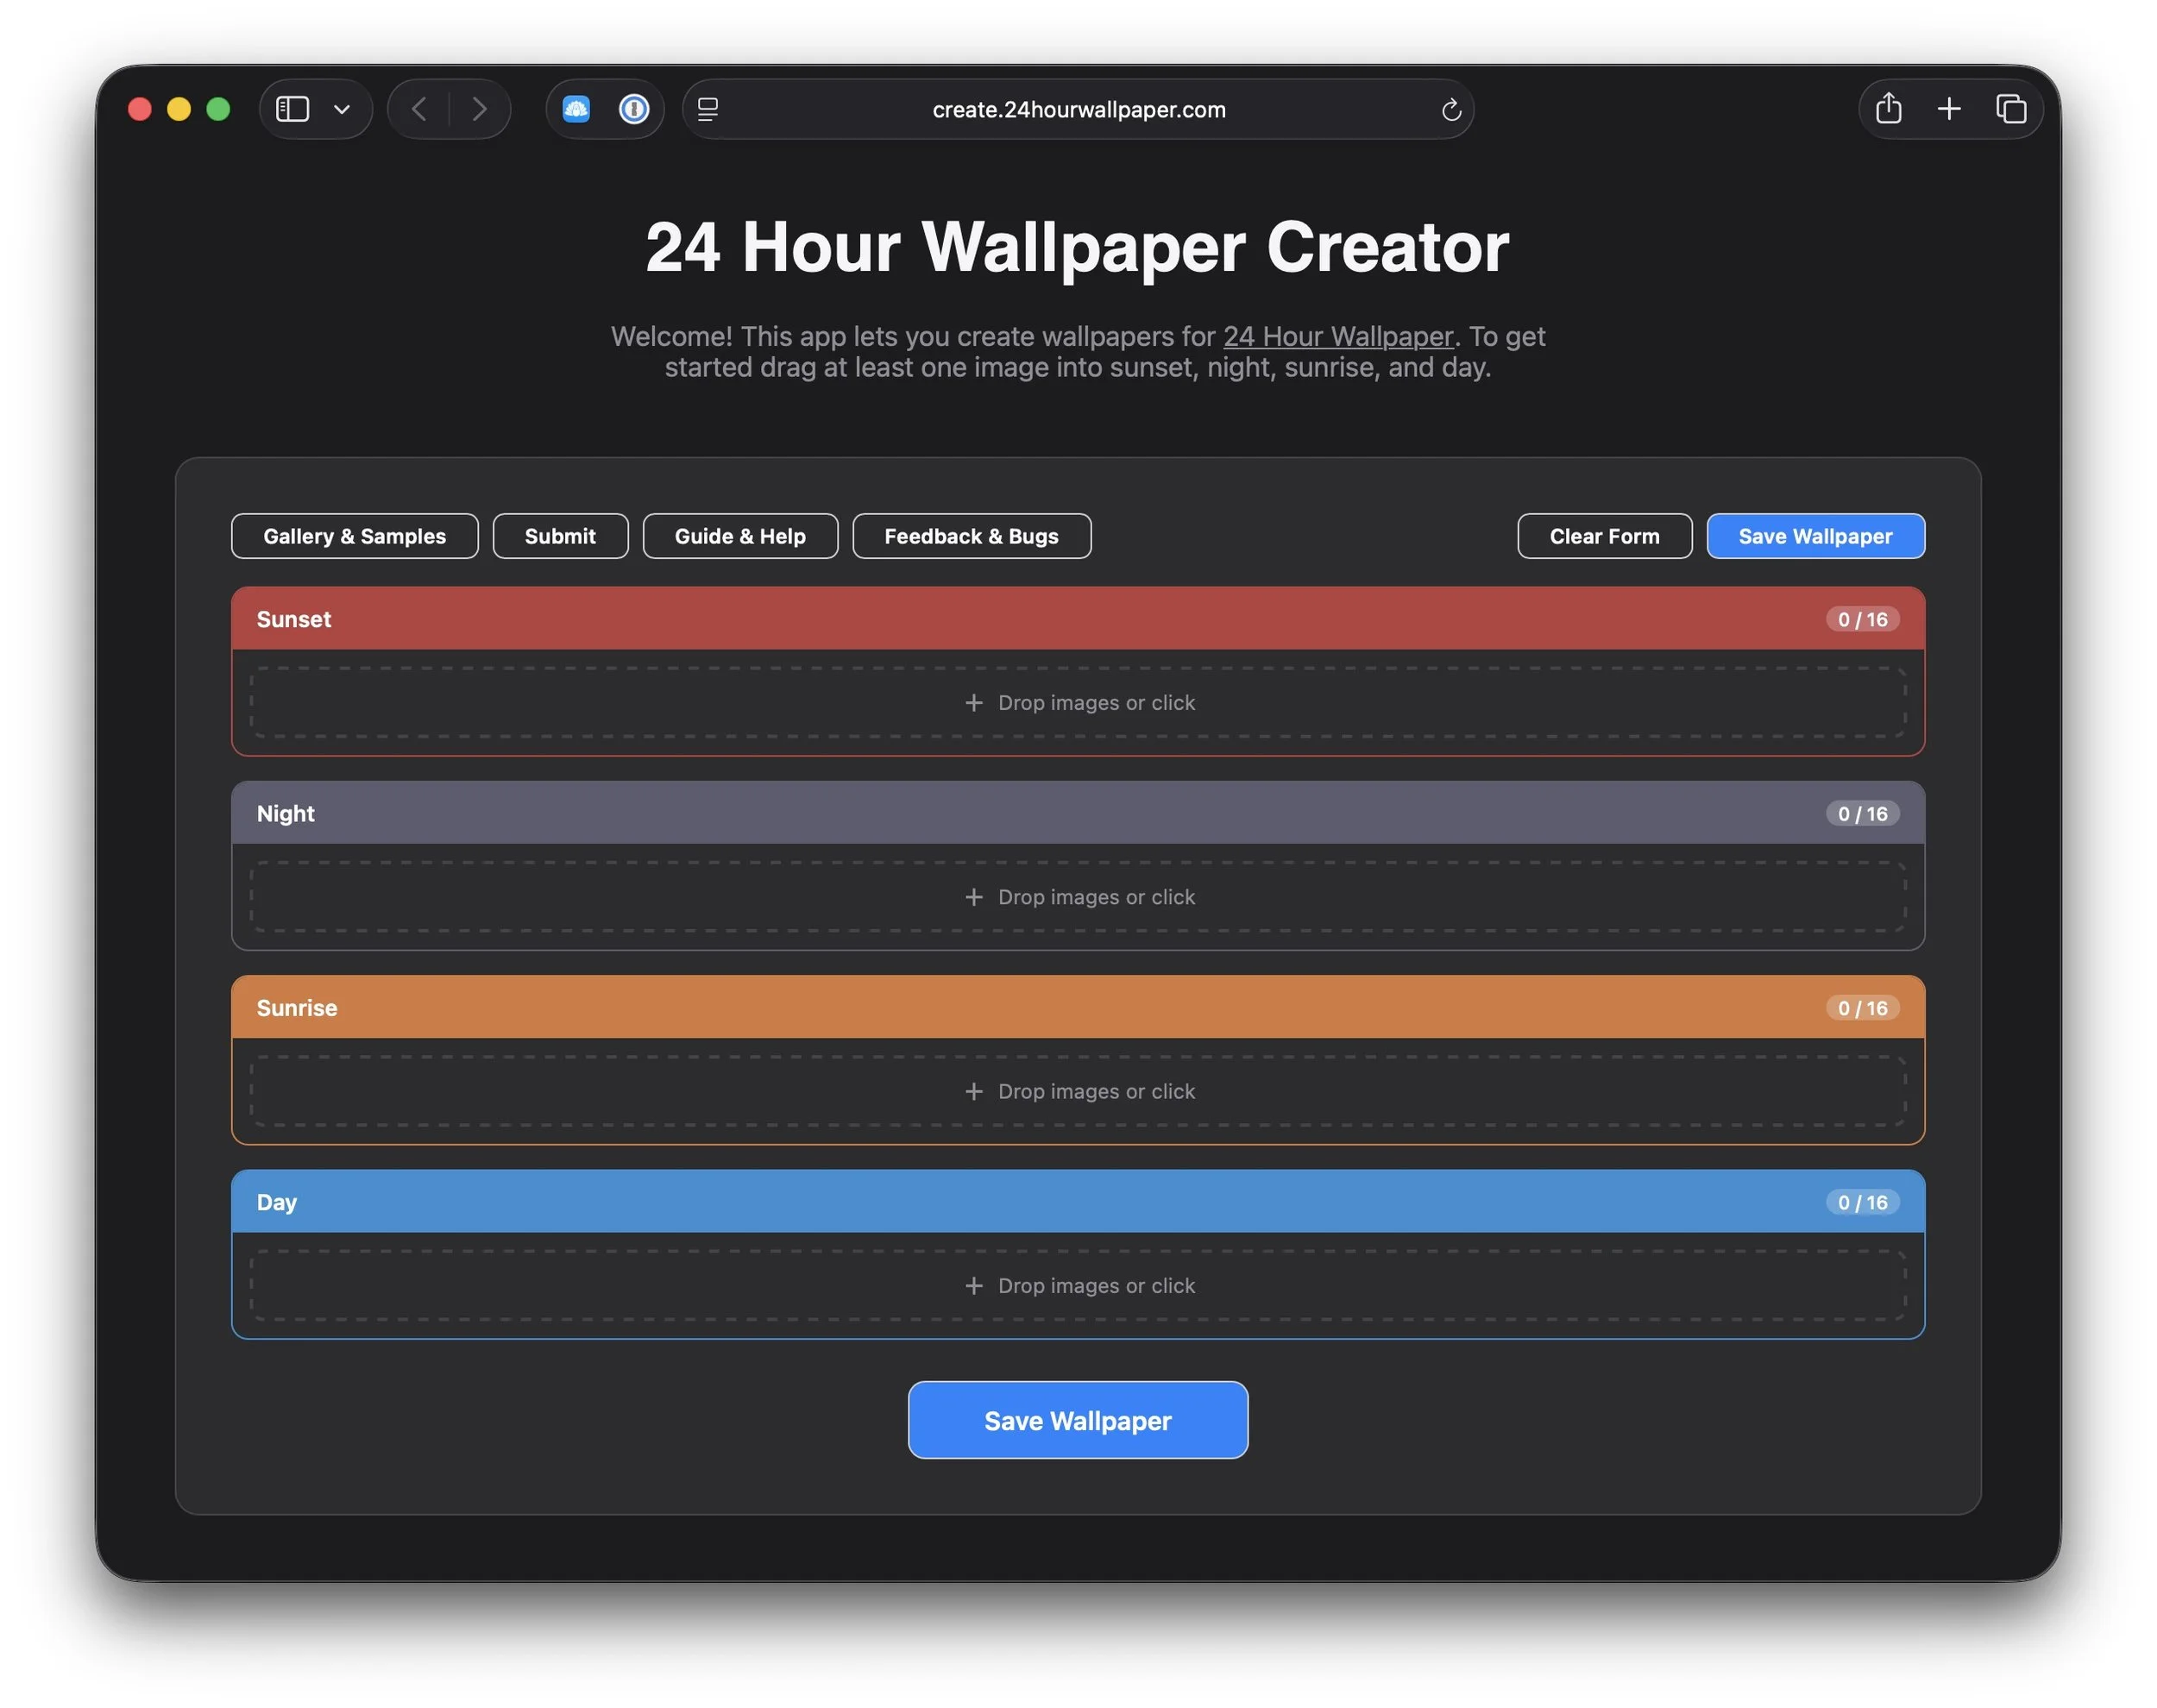
The tool for creating 24 Hour Wallpapers can be accessed at https://create.24hourwallpaper.com/. The creation tool is not a part of the app (yet) because we wanted the freedom to quickly iterate on and improve it in the early stages. Our hope is that this tool will eventually offer the ability to automatically generate images at different times of day, but that functionality is not ready yet.
The create tool runs entirely in your browser and never uploads your images or metadata to us. The entire process of transforming the images and metadata into a “.24h” file is done directly on your computer. You can rest assured that it is not possible for us to see anything you create here as no part of the process involves a server and your images are never uploaded.
The create tool produces downloadable wallpapers in the “.24h” format. This format is simply a zip file that contains all of the images for the wallpaper, and a configuration file. You can change the extension to .zip and extract it to see its contents. You can learn more about the internals of the format in the Create tool guide.
Using the Create tool
To use the create tool:
Drag and drop images from different times of day into the labeled sections, or press the “+” button in each section to open a file browser to select the images.
Once you have added all of the images you want to add, press the “Save Wallpaper” button. This will open a pop-over that lets you add metadata to the wallpaper, including a title and your name.
Once you have finished entering the metadata, click “Save Wallpaper” again in the pop-up. The tool will then immediately offer to download the wallpaper.
There are detailed instructions for using the create tool available in the create tool guide.
The app does not use any image metadata to determine what time to show the image. Rather the time is determined entirely based on which time of day you associate the image with, and the order of the image in that segment (e.g. sunrise, sunset, day, night.) So be sure to place your images into the correct segment and order them in order of progressing time.
Understanding the 24 Hour Wallpaper Format
The 24 Hour Wallpaper ProTime engine uses a novel and easy way to associate images with time-of-day. Rather than using sun angle, or explicit timing, 24 Hour Wallpapers are made up of ordered sets of images based on time of day. Each time of day requires at least one image for the wallpaper to work. So for the simplest possible wallpaper, you need one image for day, one image for night, one image for sunrise, and one image for sunset.
Ordering of the images is critically important. When more than one image is set for a given time of day, the app will display the images in the order they are arranged in the tool (and defined in the metadata.) The images for sunset for example will be displayed between the start of golden hour, and the end of civil twilight. If you provide only one image for sunset, that image will be shown for that entire period. If you provide more than one image, the images will be shown at evenly spaced times within that period.
Creating/capturing 24 Hour image sequences
So now we’re to the hard part, which is actually capturing or creating the images for your wallpaper. If you already have a rich catalog of photographs featuring different times of day, you can utilize photos you’ve already shot to create wallpapers. However if you’ve just got a single image to work with, you’ll need to use generative tools to create versions of that image at different times of day.
For now we haven’t produced documentation on the best ways to do this. However we will be doing that at the upcoming creation workshop. So for now, for more information here, sign up for the workshop! And in a few weeks we will have the workshop video here explaining the rest of the process.